1000 Lumen Trionic LED Front Light

This manual both shows how you attach the light holder and the light on a Walker (left column below) and also how you attach them on a Veloped (right column below).

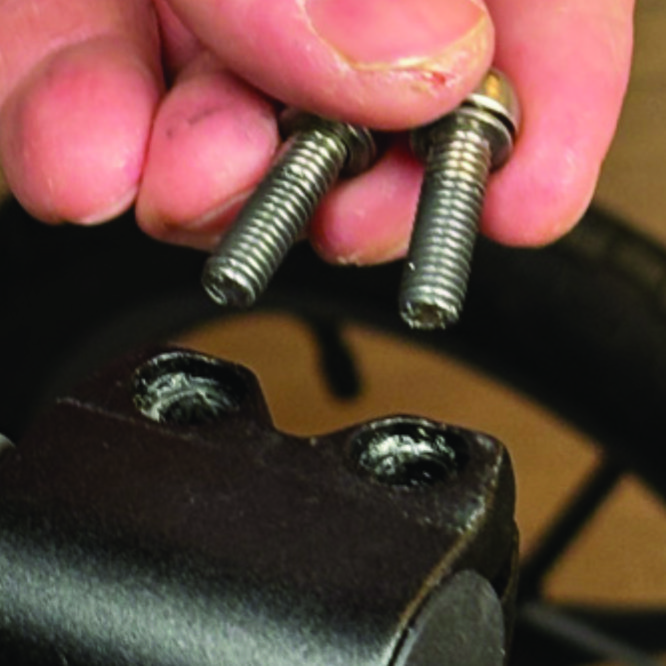
In the left-hand photo, A shows the holder attachment parts for a Walker (2 screws + 2 washers). B shows the holder attachment parts for a Veloped (1 screw + 1 knurled nut + 1 nut).

1000 Lumen Trionic LED Front Light

Attaching the Light Holder

Instructions for a Walker

On top of the black semi-vertical tube, locate the two screws that clamp the grip tube, situated in front of the brake lever.
A1. On top of the black semi-vertical tube, locate the two screws that clamp the grip tube, situated in front of the brake lever.
Loosen both screws with the 5mm allen key included with the LED light.
A2. Loosen both screws with the 5mm allen key included with the LED light.
Remove the two screws from the grip clamp.
A3. Remove the two screws from the grip clamp.
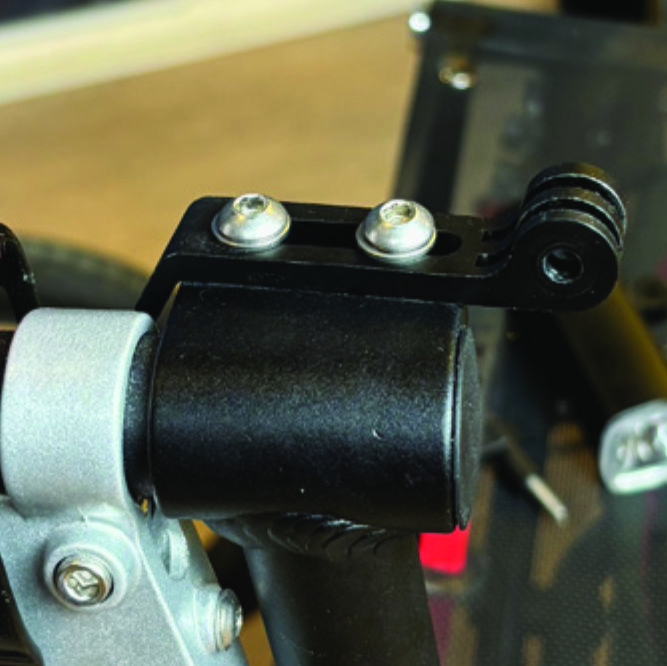
Place the light holder on top of the grip clamp, with its circular and slotted light attachment pointing forwards and upwards. Enter the two screws with washers into the holes of the clamp.
A4. Place the light holder on top of the grip clamp, with its circular and slotted light attachment pointing forwards and upwards. Enter the two screws with washers into the holes of the clamp.
Tighten the two screws with the 5mm allen key. NOTE: It is important that you tighten the screws properly as they secure the grip tube with its rubber grip and brake lever.
A5. Tighten the two screws with the 5mm allen key. NOTE: It is important that you tighten the screws properly as they secure the grip tube with its rubber grip and brake lever.

Instructions for a Veloped

Locate the screw at the center folding hinge of the U-shaped grip bar of the Veloped. Unscrew the screw with the included 4mm allen key and remove it.
A1. Locate the screw at the center folding hinge of the U-shaped grip bar of the Veloped. Unscrew the screw with the included 4mm allen key and remove it.
Replace the old screw with the longer screw included with the LED light. Attach the longer screw to the hinge and tighten it with the 4mm allen key.
B2. Replace the old screw with the longer screw included with the LED light. Attach the longer screw to the hinge and tighten it with the 4mm allen key.
Attach the short angled end of the light holder to the lower end of the screw, on the downside of the U-shaped grip bar. The holder should point downwards. Fasten the holder with one washer and the knurled nut that you tighten with your fingers.
B3. Attach the short angled end of the light holder to the lower end of the screw, on the downside of the U-shaped grip bar. The holder should point downwards. Fasten the holder with one washer and the knurled nut that you tighten with your fingers.
For a more secure holder attachment, avoiding the holder to unintentionally turn sideways, replace the knurled nut with the included stainless steel nut and tighten it with a 10mm spanner.
B4. For a more secure holder attachment, avoiding the holder to unintentionally turn sideways, replace the knurled nut with the included stainless steel nut and tighten it with a 10mm spanner.
This photo shows the light holder as correctly attached.
B5. This photo shows the light holder as correctly attached.

Attaching the LED Light to the Holder

Instructions for a Walker

Identify the circular front end of the light holder, with two slots for attaching the light.
A6. Identify the circular front end of the light holder, with two slots for attaching the light.
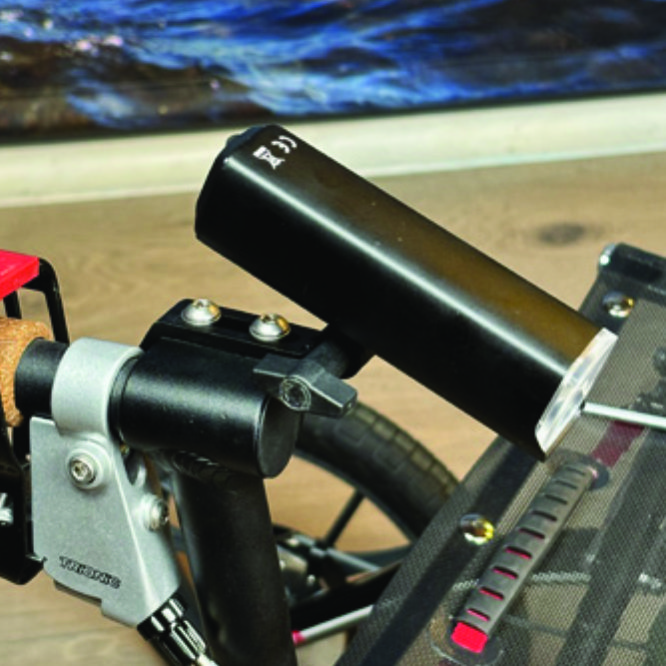
Push the slotted bracket of the light into the slots of the holder and make sure they are aligned. Seen in the traveling direction of the Walker, enter the included wingnut from the left and tighten it.
A7. Push the slotted bracket of the light into the slots of the holder and make sure they are aligned. Seen in the traveling direction of the Walker, enter the included wingnut from the left and tighten it.

Instructions for a Veloped

Locate the screw at the center folding hinge of the U-shaped grip bar of the Veloped. Unscrew the screw with the included 4mm allen key and remove it.
B6. Locate the screw at the center folding hinge of the U-shaped grip bar of the Veloped. Unscrew the screw with the included 4mm allen key and remove it.
Identify the circular front end of the light holder, with two slots for attaching the light.
B7. Identify the circular front end of the light holder, with two slots for attaching the light.

Instructions for Use

Overview

Caution

Caution

Battery Performance

Battery performance is significantly affected by temperature variations: •Low Temperature: At 0°C, capacity decreases by 5–10%, reducing operation time by 50%. At -20°C, capacity drops by 30%, potentially shortening operation time by 70%. Performance returns to normal when the temperature rises to 20°C. •Self-Discharge Rate: At room temperature, the battery loses about 1% of its capacity per day. When stored at 40°C, the self-discharge rate increases, leading to a loss of approximately 5% of capacity per day. To maintain optimal battery performance, avoid exposing it to extreme temperatures and store it in a cool, dry place. If you do not use the battery for a long time be sure to recharge the battery every 3 months.

Safe Mode

When the battery is low, the light will automatically switch to a 50-lumen high-beam safe mode, providing an additional 30 minutes of operation.

How to operate the light

Press and hold the switch for 2 seconds to turn the light on or off. Click once to cycle through modes, and double-click to enable ultra-bright mode (1000 lm).

The package contains

Charging And Powerbank

Product Reviews    

  • Absolutely recommended…

    My physiotherapist said: it is like a Porsche! And I can only agree with his opinion.

    The rollator is not only elegant but also extremely reliable; I have a secure grip even on bumpy paths, even in snow it gave me good security. The brakes work pe…

  • Veloped Trek…

    We were looking for a product that is suitable for many grounds and street surfaces, has enough storage space for shopping and that is easy to use. The Veloped is all of this.
    It is bigger and wider than other rollators and at the rehab clinic there…

  • Absolutely love my new Trionic 4 wheel……

    It’s so easy to walk with, the 14inch wheels are great for the smaller curbs.
    I like the way that the two front wheels are always together, it makes a huge difference.
    I would certainly recommend this product.

    The customer service I received was…

  • Absolutely delighted with my Veloped and worth every penny.…

    Beautifully made and well designed.

    I broke my back nearly two years ago . I also have polymyalgia, fibromyalgia, osteoporosis, osteoarthritis and liver disease so was quite inactive even before then.

    I am still building up my stamina, but c…

  • Finally, no more pain in my hands…

    Since I have this rollator, I could cry with happiness. I walked around with the wrong one for three years and ruined my right hand.

    The walker arrived and UPS even helped me with the box. I opened the box without any problems, overturned it and s…

  • Excellent customer service…

    I messed up the thread for the clamping screw on the brake lever. Customer service helped me in a very friendly and reliable manner. After a few days I received a replacement screw, but unfortunately the thread in the hole of the lever was worn out.

  • My expectations…

    It fulfilled my expectations completely.…

  • Trionic for security and fun times.…

    We bought both the 12” & 9” Walkers, for walks outside and another for visits to doctors' offices, restaurants, etc. Both are great with exceptional stability. You do not need two, but it is a luxury to have them. One for walks outside on all surface…

  • A Winner!…

    I have suffered from peripheral neuropathy for over 5 years, which makes it difficult for me to walk. Indeed, my daughter was appalled to see how unstable I was even with a stick and said that I should get aid with wheels. I tried what was available …

Subscribe to our newsletter!